Appearance
Configuring Tax Settings & Classes
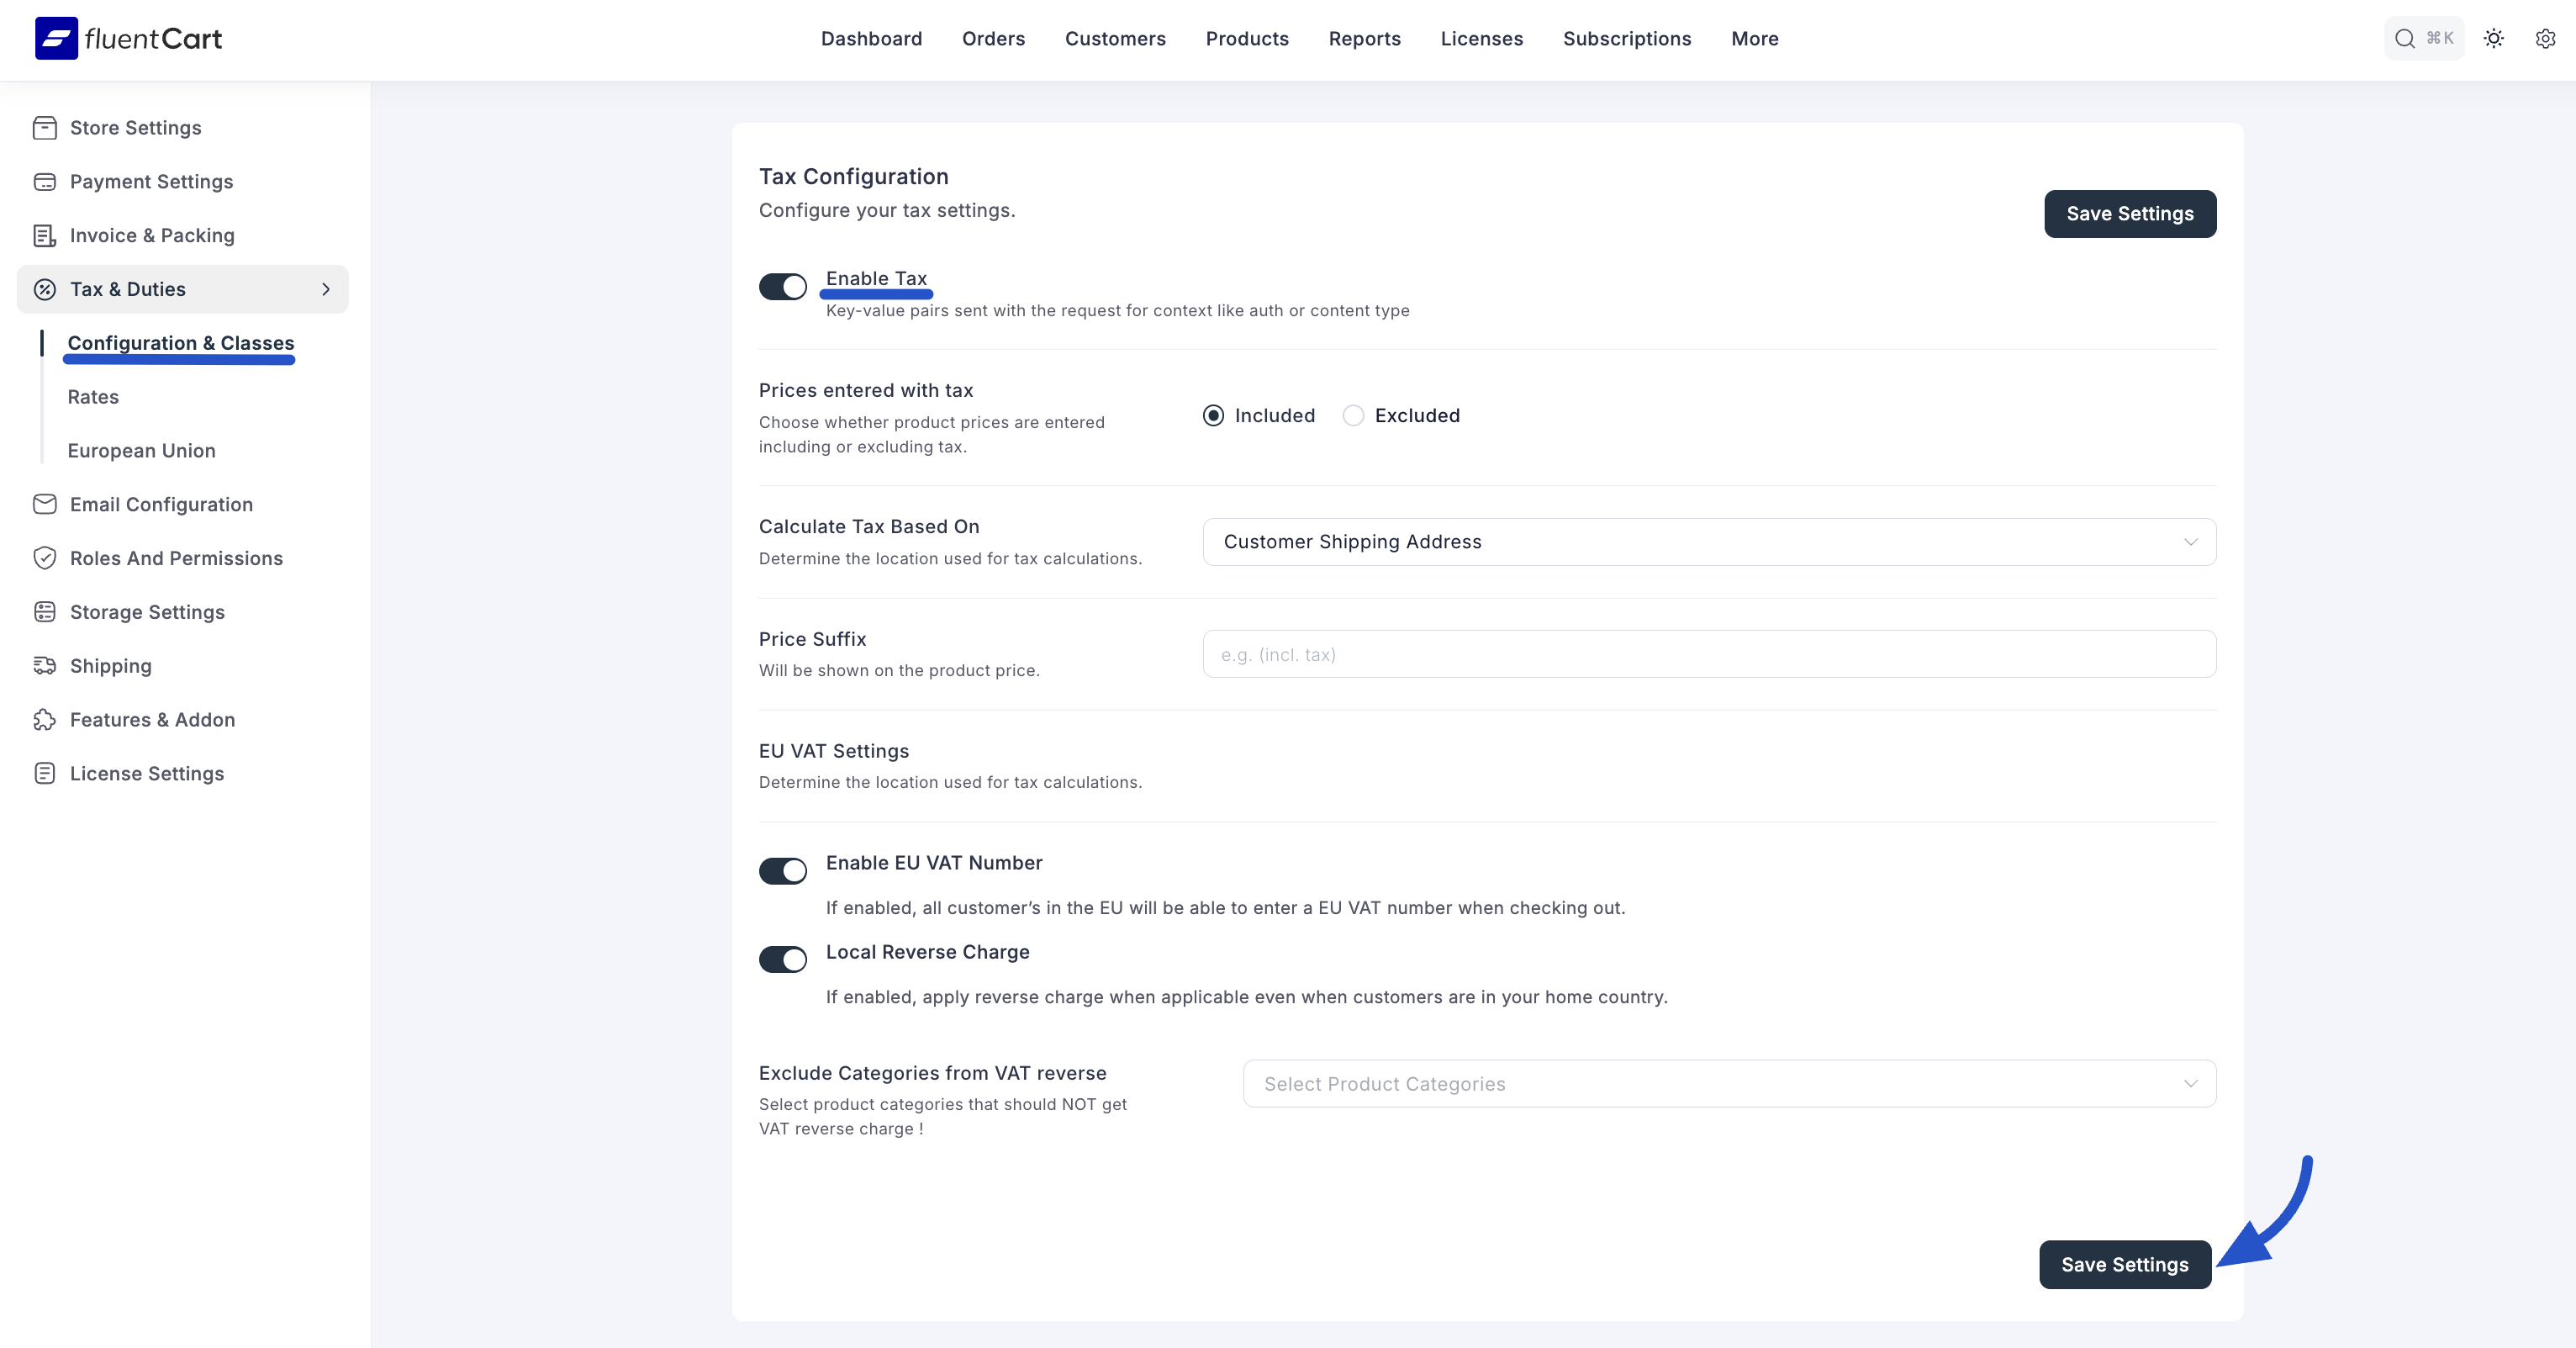
The Configuration & Classes screen is the control center for your store's entire tax system. Here, you will set the fundamental rules for how taxes are calculated, manage EU VAT compliance for B2B sales, and create Tax Classes to handle different tax rates for different types of products.
Getting these settings right is the first step to ensuring your tax calculations are accurate.
Accessing Tax & Duties Settings
- From your WordPress dashboard, navigate to FluentCart Pro > Settings.
- Click on the Tax & Duties tab from the left-hand menu.
- Select the Configuration & Classes sub-menu.
Tax Configuration
This section contains the main rules that determine how taxes are calculated across your store.
- Enable Tax: This is the master switch for your store's tax system. When enabled, FluentCart will begin applying your tax rules at checkout.
- Prices entered with tax: This tells FluentCart whether your product prices already include tax (Included) or if tax should be added at checkout (Excluded).
- Calculate Tax Based On: This determines which customer address is used for tax calculations: Customer Shipping Address, Customer Billing Address, or Store Base Address.
- Price Suffix: This allows you to add a short piece of text that will be displayed next to your product prices on the storefront. For example, you could add
+ VATor(incl. Tax)to provide clarity for your customers.

EU VAT Settings
This section is specifically for handling European Union VAT regulations for your business-to-business (B2B) sales.
- Enable EU VAT Number: When enabled, this adds a VAT number field to your checkout page for customers in the EU. If a customer provides a valid VAT ID, the VAT will be removed from their order (a "reverse charge").
- Local Reverse Charge: In some cases, reverse charge rules can apply even if the business customer is in your own country. Enable this to ensure FluentCart handles these specific transactions correctly.
- Exclude Categories from VAT reverse: This allows you to select specific product categories that should always be charged VAT, even if a customer provides a valid VAT ID. This is useful for certain types of products or services that are not eligible for the reverse charge mechanism.
After configuring these settings, be sure to click the Save Settings button.
Managing Tax Classes
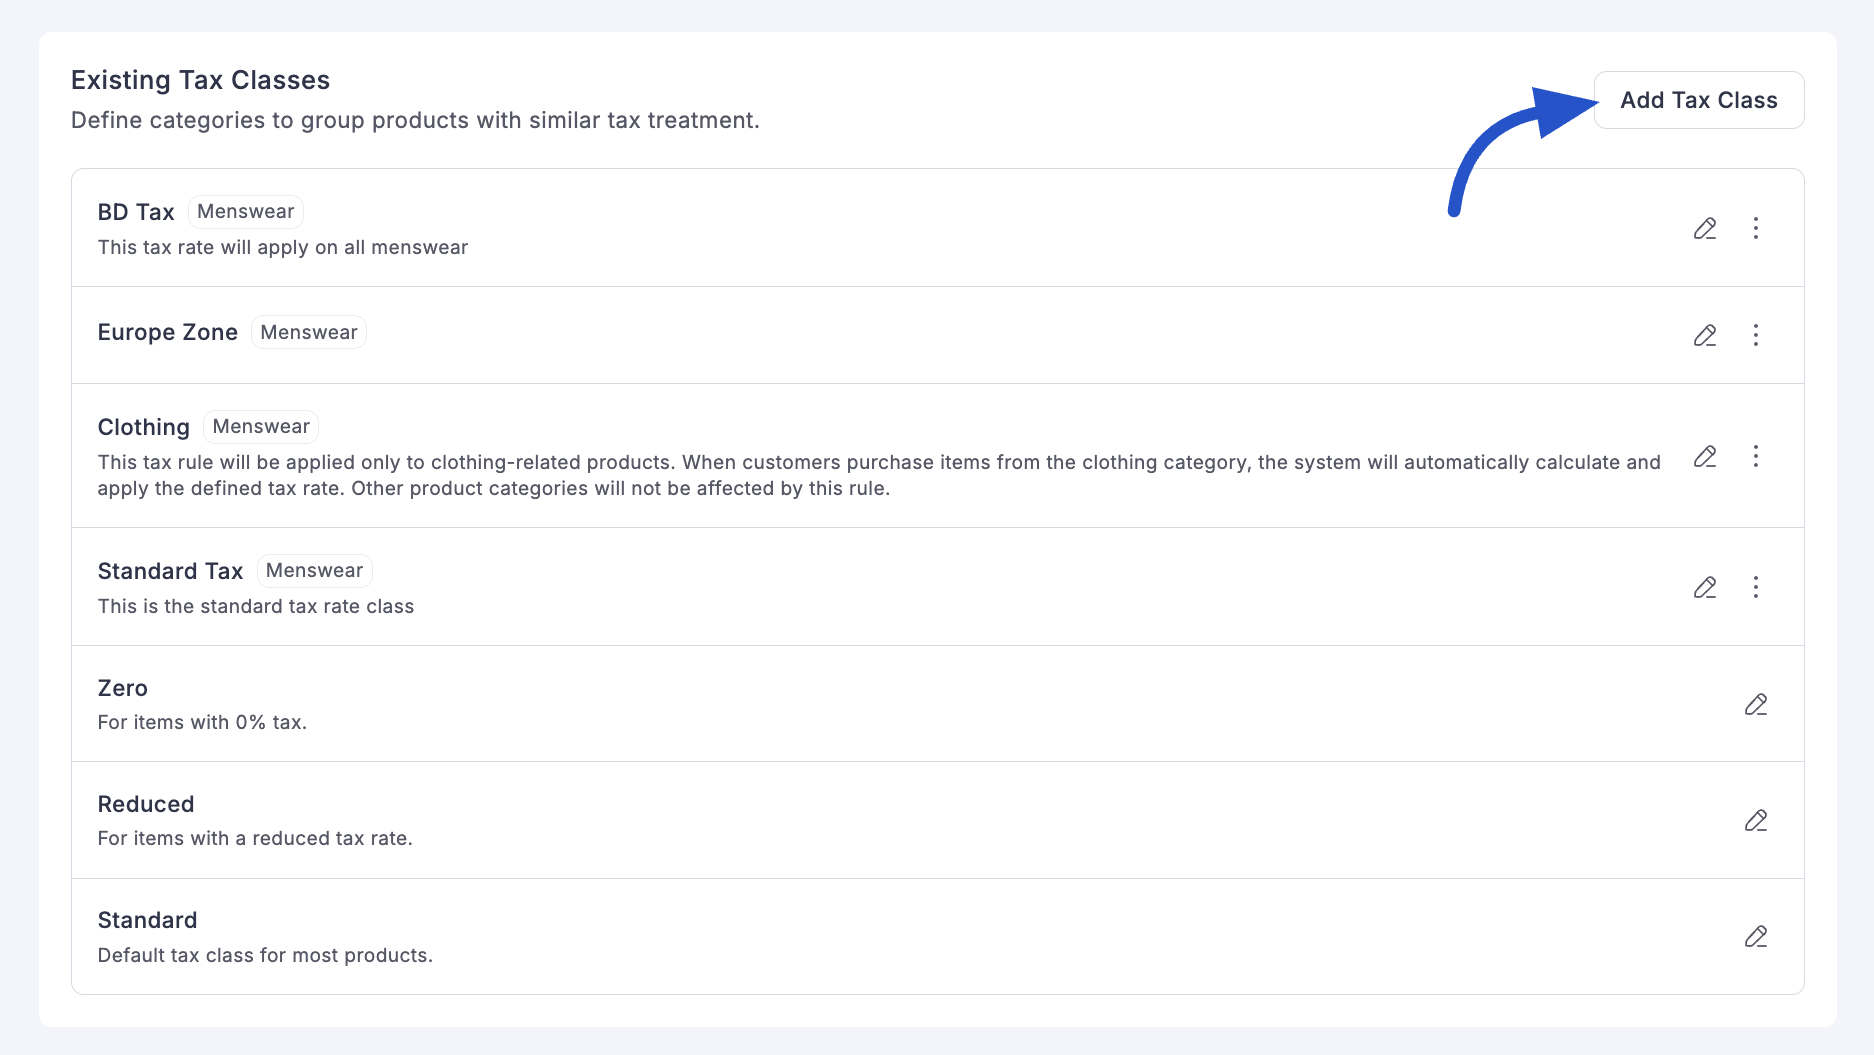
Tax Classes are the best way to group products that have similar tax treatments. This is essential if you sell items that are not all taxed at the same rate (e.g., standard-rate electronics vs. zero-rated books).
Adding a New Tax Class
In the Existing Tax Classes section, click the Add Tax Class button.

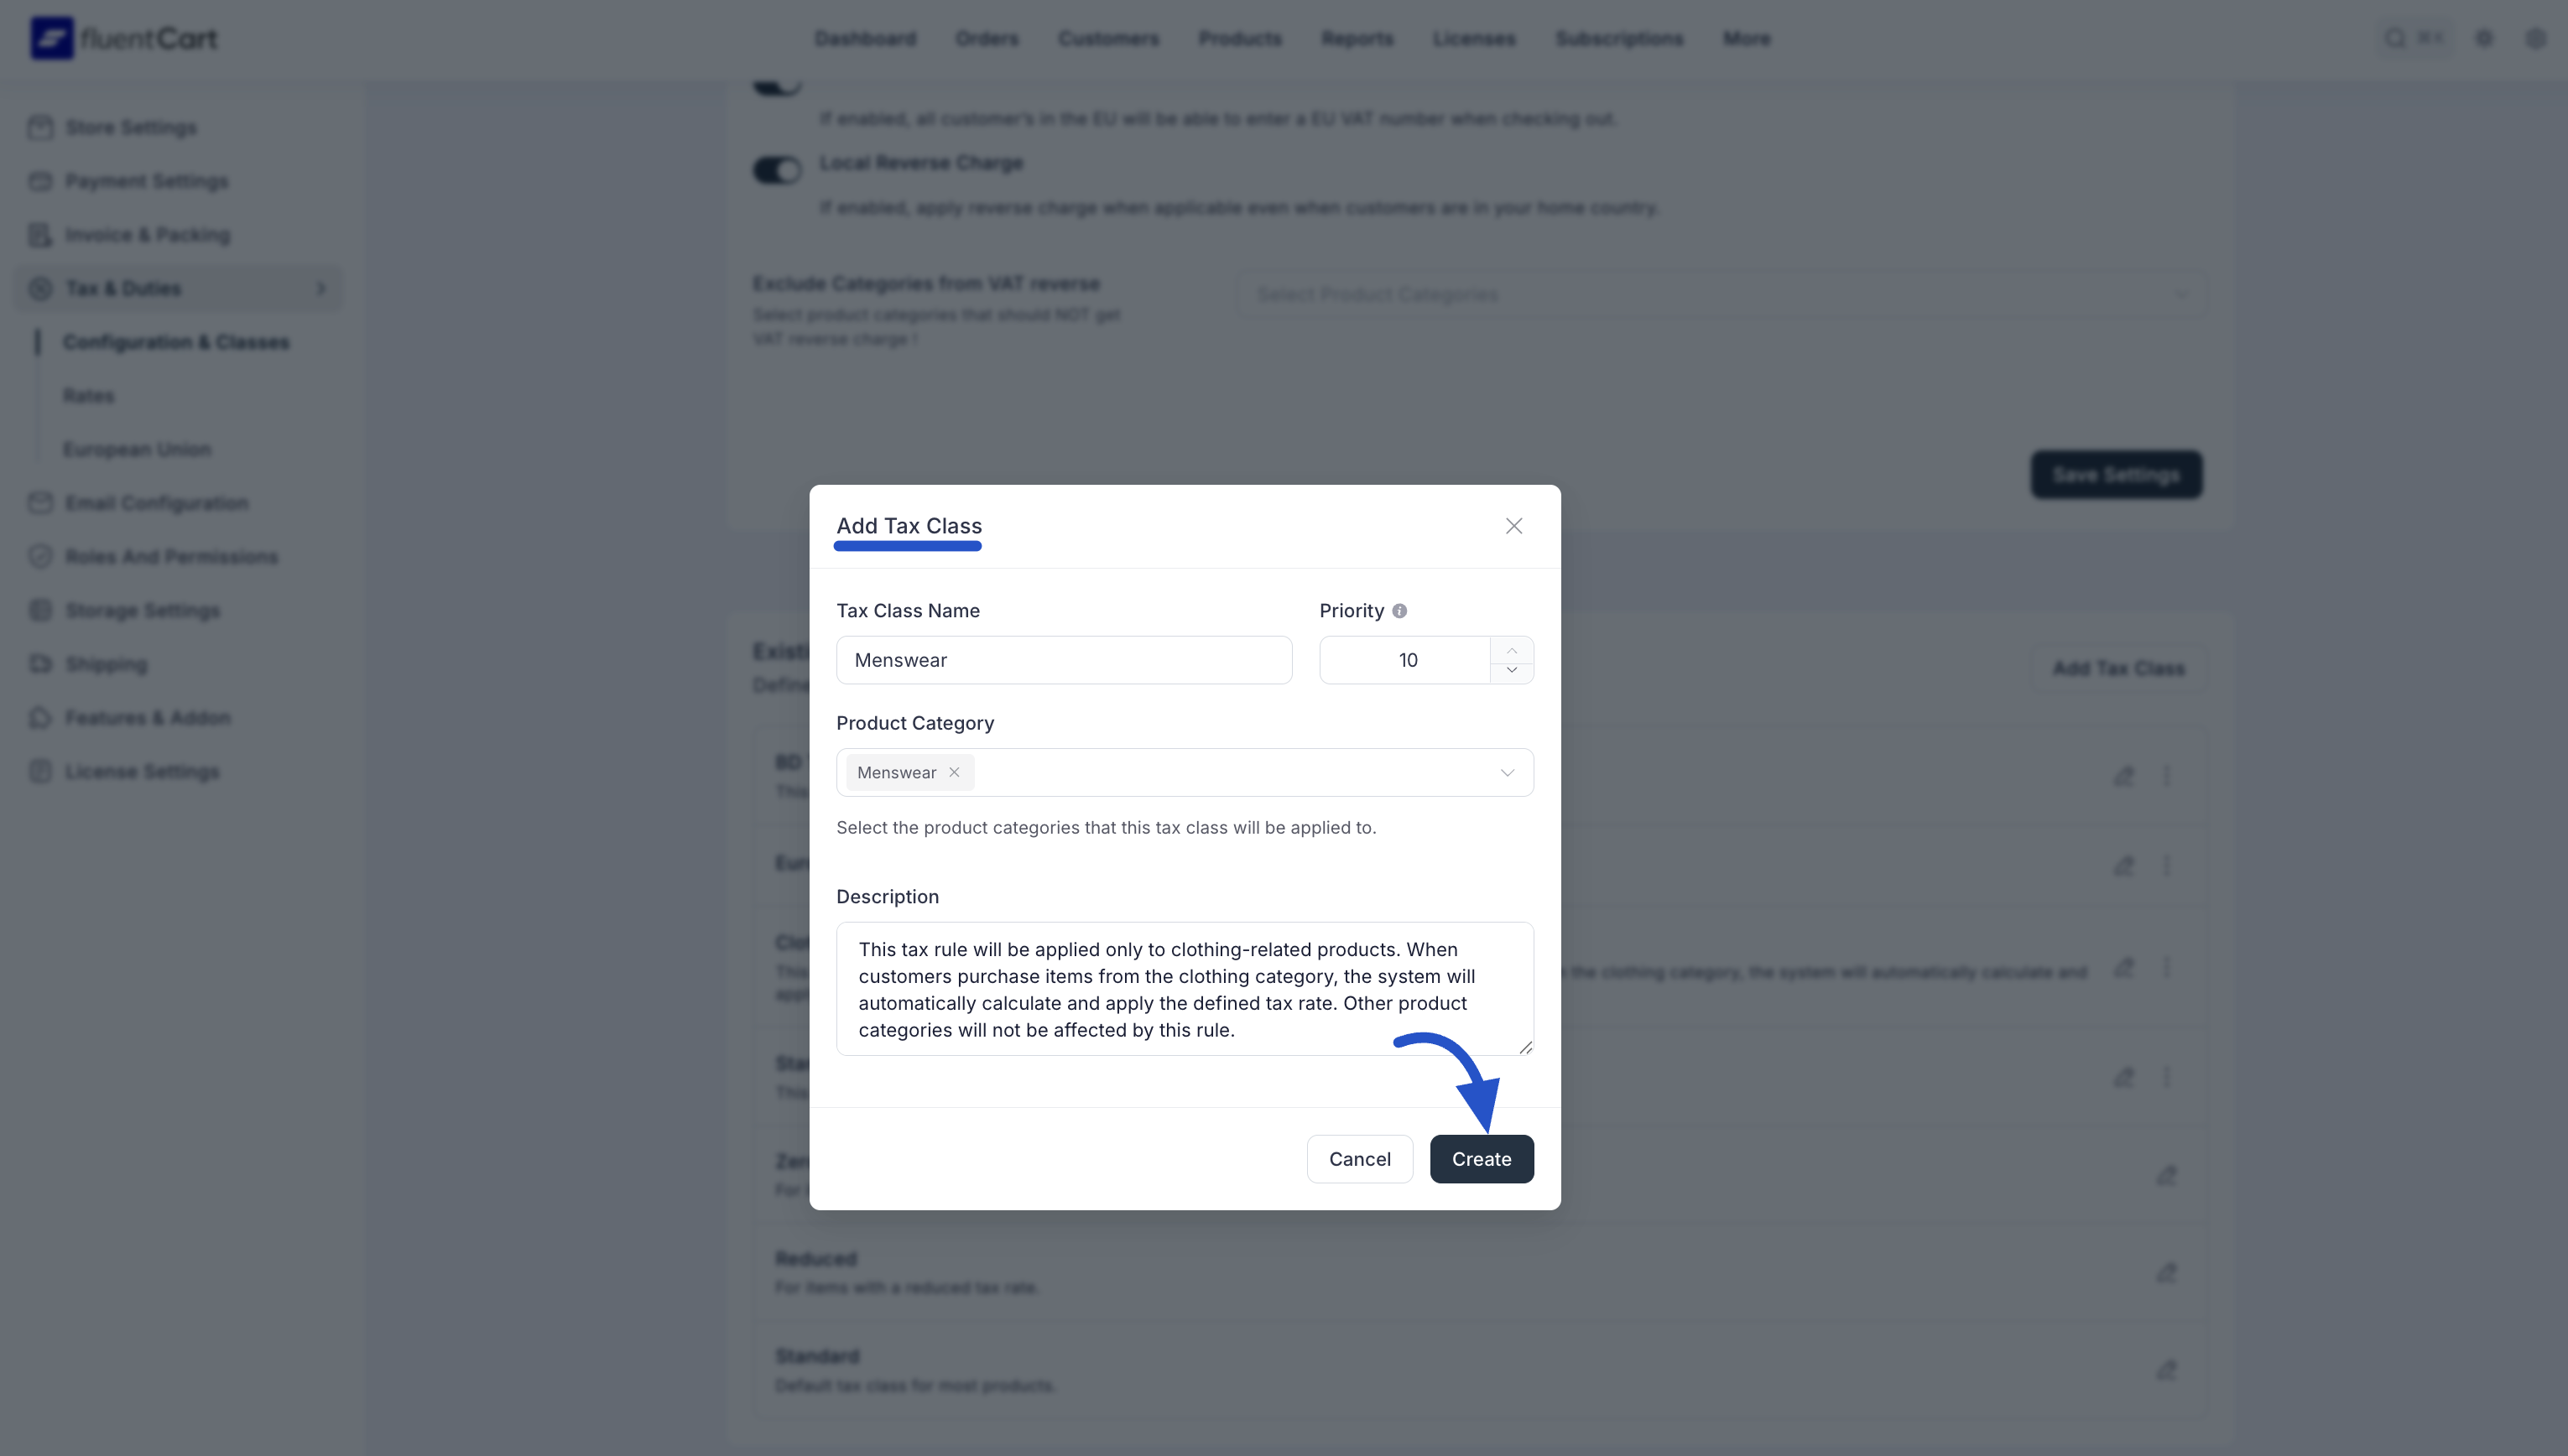
- A pop-up window will appear. Fill in the details:
- Tax Class Name: A clear name, like "Digital Services" or "Clothing."
- Priority: A number (0-10) that determines the order in which tax classes are applied. Higher numbers have a higher priority and will be applied first.
- Product Category (Optional): You can link this tax class directly to one or more product categories. When you do, any product in the selected category will automatically use this tax class.
- Description: An internal note for your reference.
- Click Create.

Info: For a tax class to work correctly, you must complete two key steps: first, assign this class to a product (either by linking it to a Product Category here or by editing an individual product), and second, make sure you set a specific Tax Rate for this class in that country's regional settings.
Your new tax class will now appear in the list, where you can Edit or Delete it at any time using the action icons.
