Appearance
Configuring Stripe via wp-config.php
FluentCart integrates perfectly with Stripe. While you can connect your account directly from the settings panel, this guide will walk you through the more secure method of configuring Stripe by adding your API keys to your site's wp-config.php file.
Info: Storing your API keys in the
wp-config.phpfile is a security best practice. It keeps your credentials outside of the WordPress database, protecting them from potential database-related vulnerabilities.
Step 1: Get Your API Keys from Stripe
First, you need to collect your Publishable Key and Secret Key from your Stripe dashboard.
- Log in to your Stripe Dashboard.
- In the right corner, click on Developers, then select API keys from the menu.
- On this page, you will find your keys. You will need to copy both the Publishable key (starts with
pk_...) and the Secret key (starts withsk_...).
Note on Test vs. Live Keys: Your Stripe account has two sets of keys: one for testing (Test data) and one for real payments (Live data). It is recommended to start with your Test keys to ensure the connection is working correctly before switching to your Live keys.
Step 2: Add the Keys to Your wp-config.php File
Next, you will add the copied keys to your WordPress site's configuration file.
- Access the
wp-config.phpfile using any WordPress file manager plugin or through your hosting file manager. - Locate the
wp-config.phpfile in the root directory of your WordPress installation. - Open the file to edit it. Scroll down to the bottom, just above the line that says
/* That's all, stop editing! Happy publishing. */. - Add the following two lines of code, replacing the placeholders with the keys you copied from Stripe:
php
define('FCT_STRIPE_LIVE_PUBLIC_KEY','ENTER YOUR PUBLIC API KEY HERE');
define('FCT_STRIPE_LIVE_SECRET_KEY','ENTER YOUR SECRET KEY HERE');
Example (using test keys for testing mode):
php
define('FCT_STRIPE_TEST_PUBLIC_KEY','ENTER YOUR PUBLIC API KEY HERE');
define('FCT_STRIPE_TEST_SECRET_KEY','ENTER YOUR SECRET KEY HERE');
Save the wp-config.php file and close it.
Step 3: Configure Webhooks
Webhooks are essential for the integration to function correctly. They allow Stripe to send real-time notifications to your store about payment events, such as successful charges, refunds, and subscription updates.
- Copy Your Webhook URL: On the FluentCart Stripe settings page, you will see your unique Webhook URL. Copy this URL to your clipboard.
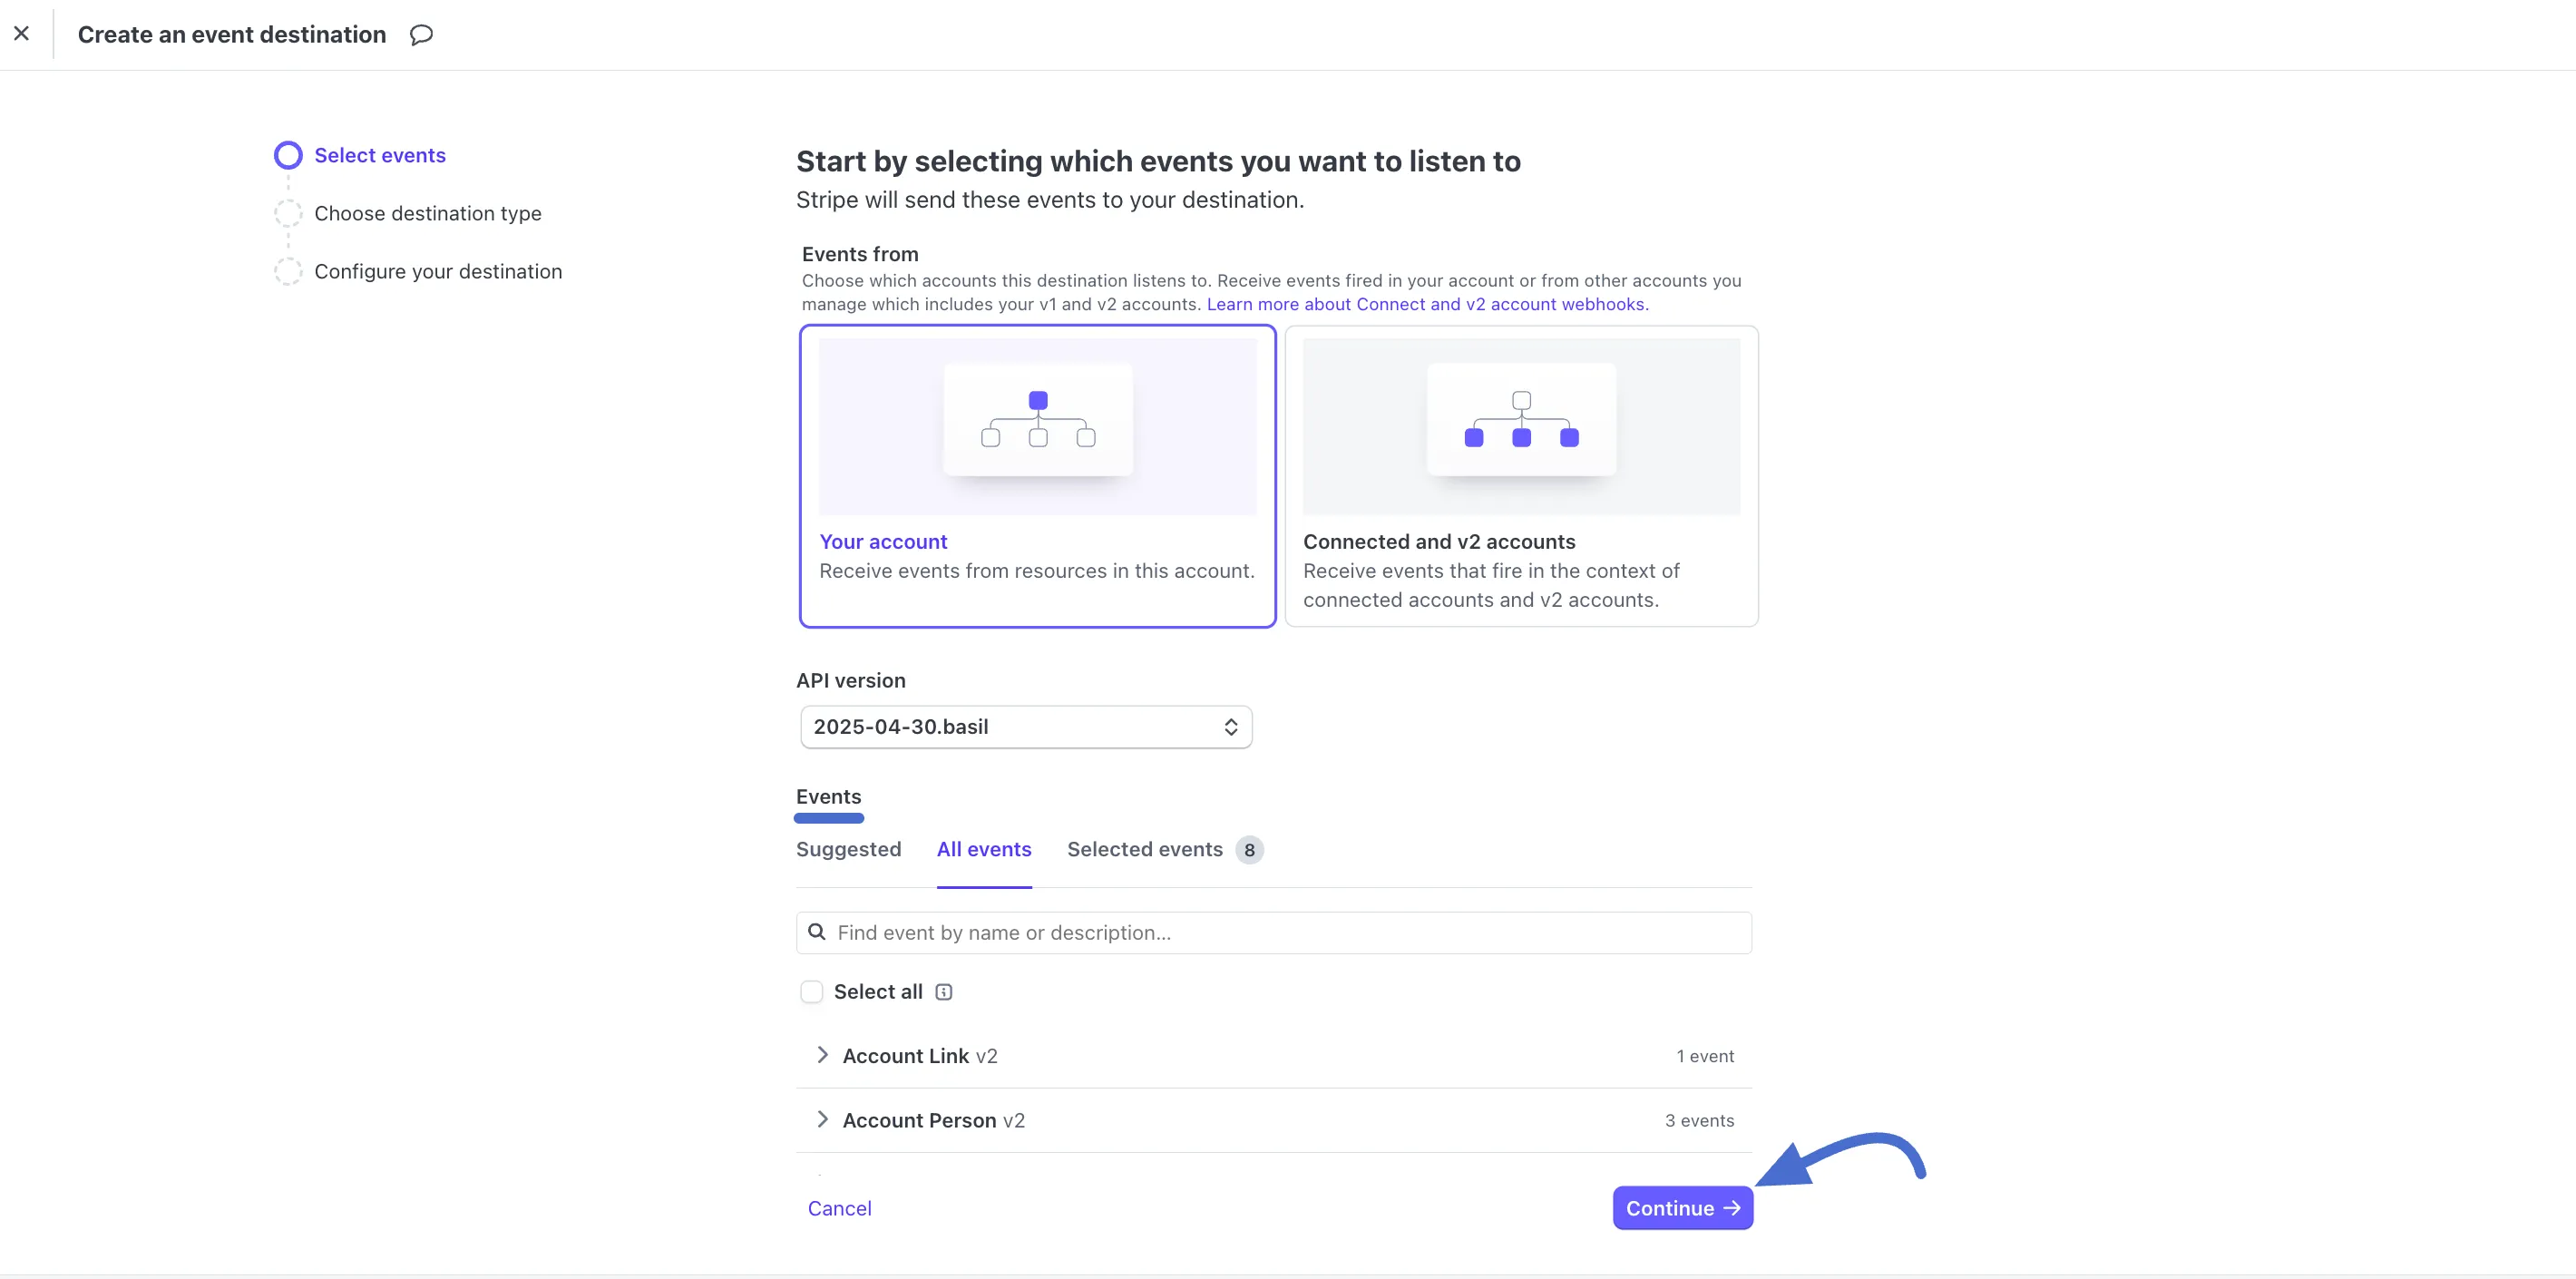
- Configure in Stripe: Click the Add Endpoint link, and you’ll be redirected to your Create an event destination page.
- Select the Important Events: Now, choose the events recommended by FluentCart for Stripe to send to your endpoint. Under Events, click the All events tab. Click the checkboxes to select these specific events:
The Events recommended by FluentCart are briefly explained below:
- checkout.session.completed: The customer finished checkout, and the order is ready to process.
- charge.refunded: A completed payment has been refunded to the customer.
- charge.refund.updated: Details of a refund were updated (like the amount or reason).
- charge.succeeded: The customer’s payment went through successfully.
- invoice.paid: A subscription invoice was paid by the customer.
- invoice.payment.failed: A subscription invoice payment failed (e.g., card declined).
- customer.subscription.deleted: The customer canceled their subscription.
- customer.subscription.updated: The customer’s subscription was changed (e.g., upgraded or downgraded).
Once you select all the suggested Webhook Events, click the Continue button.

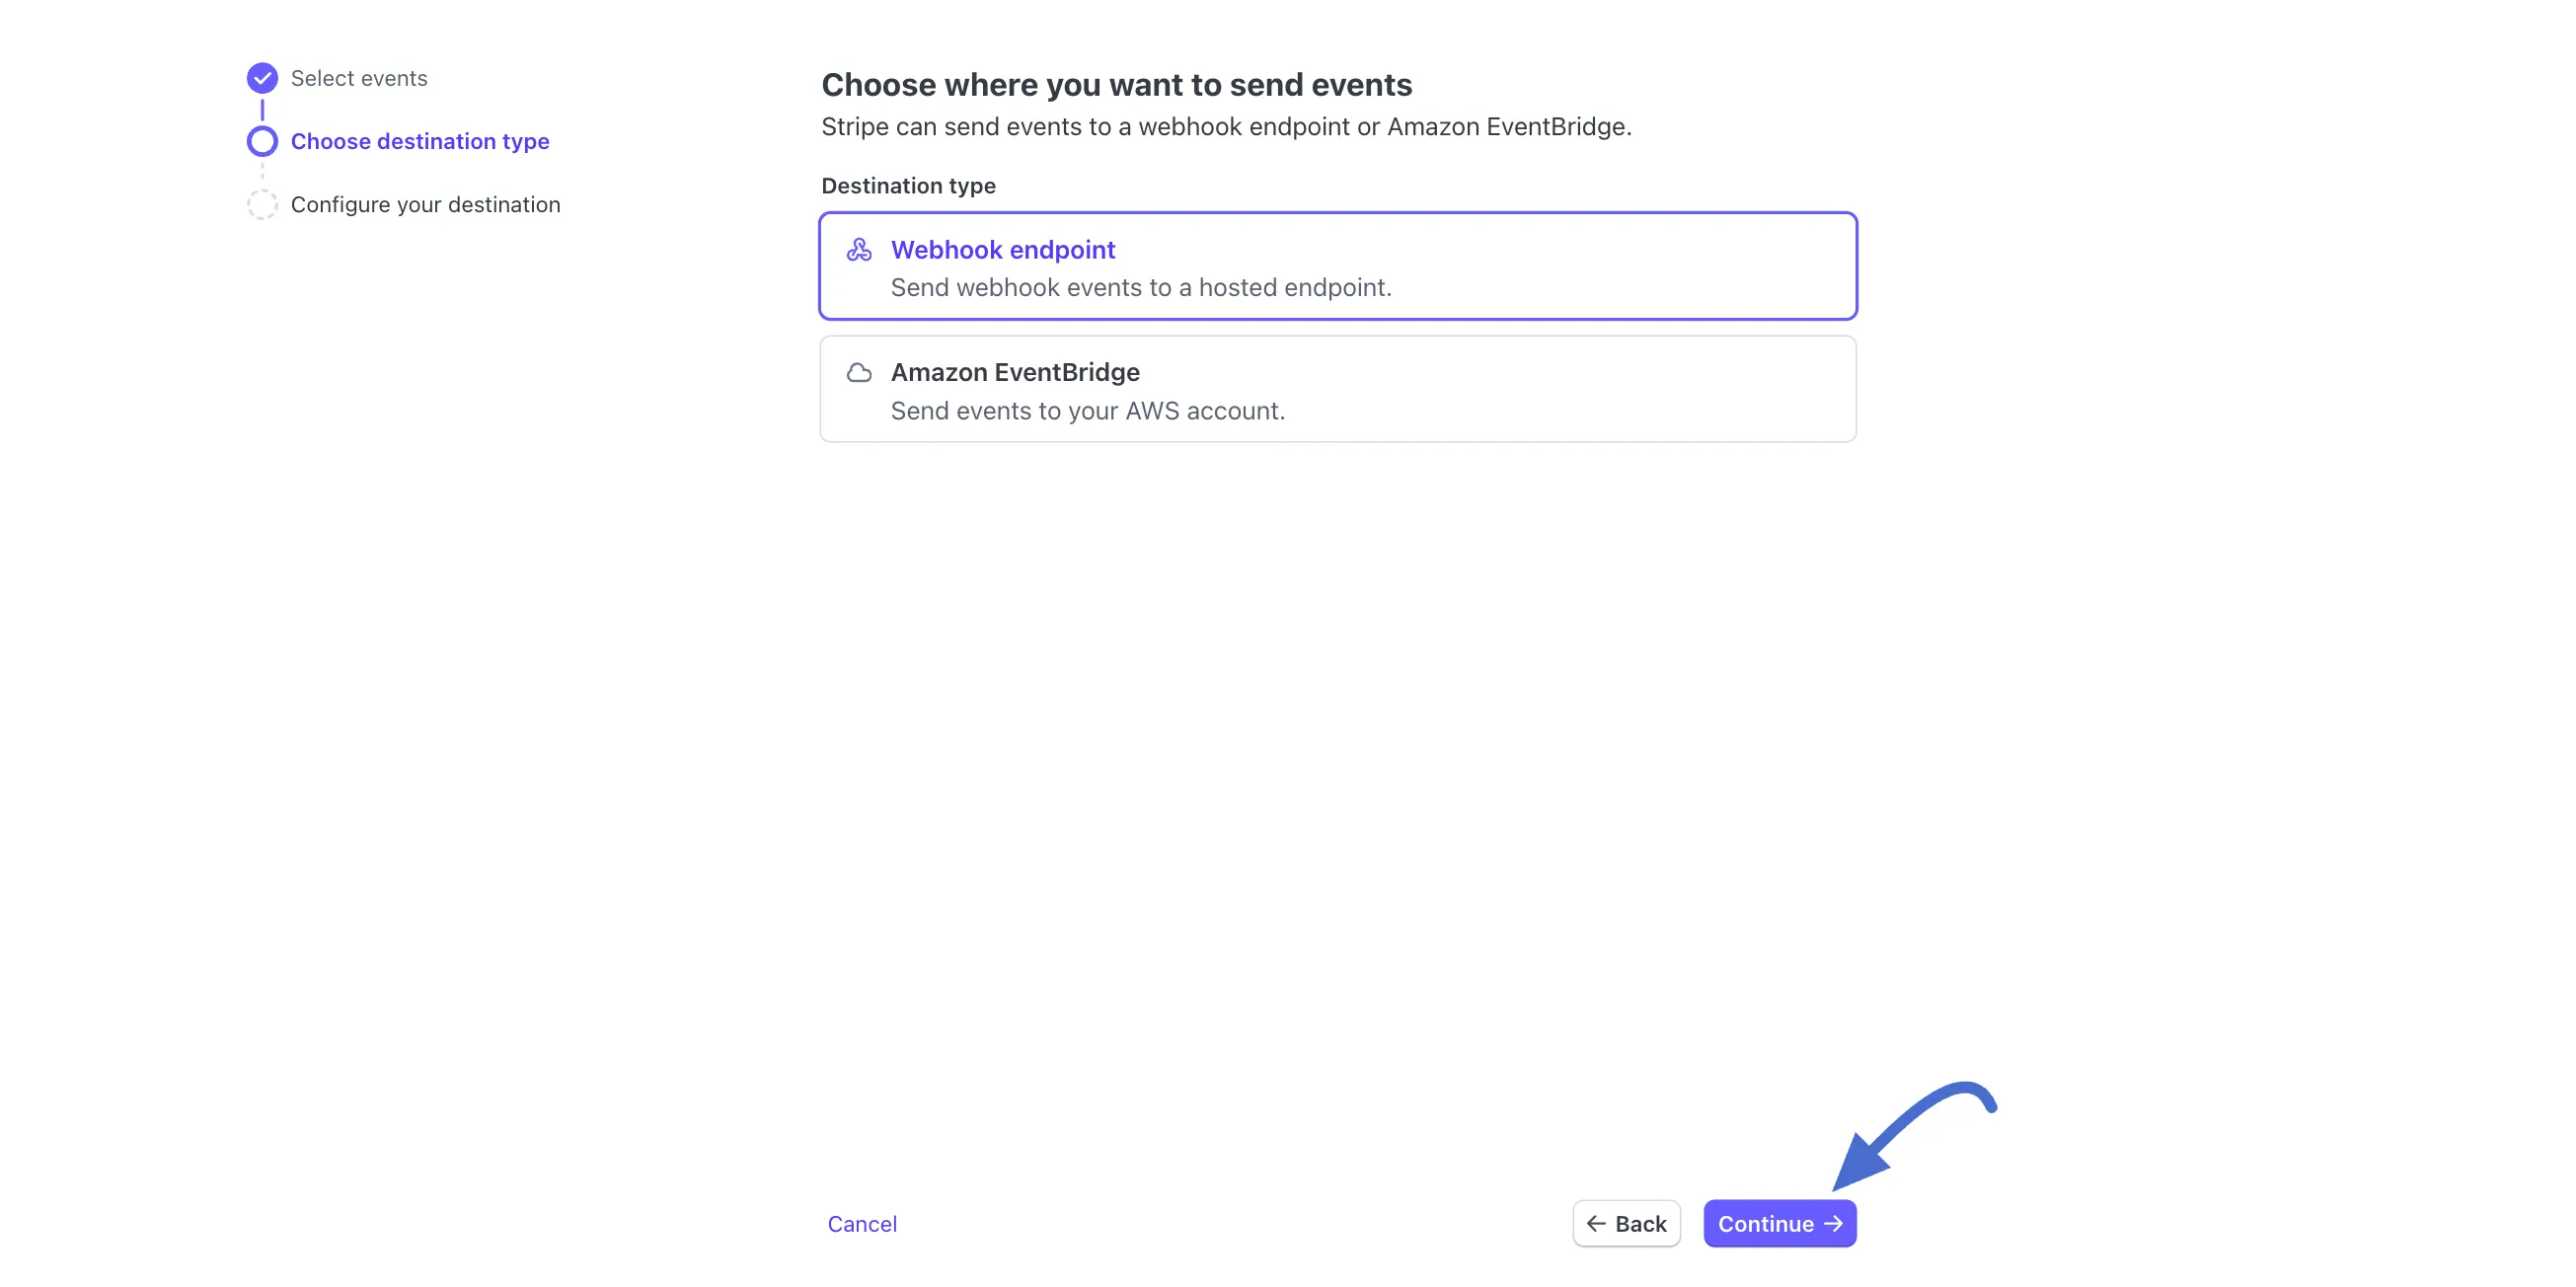
Then, select the Webhook endpoint and again click the Continue button.

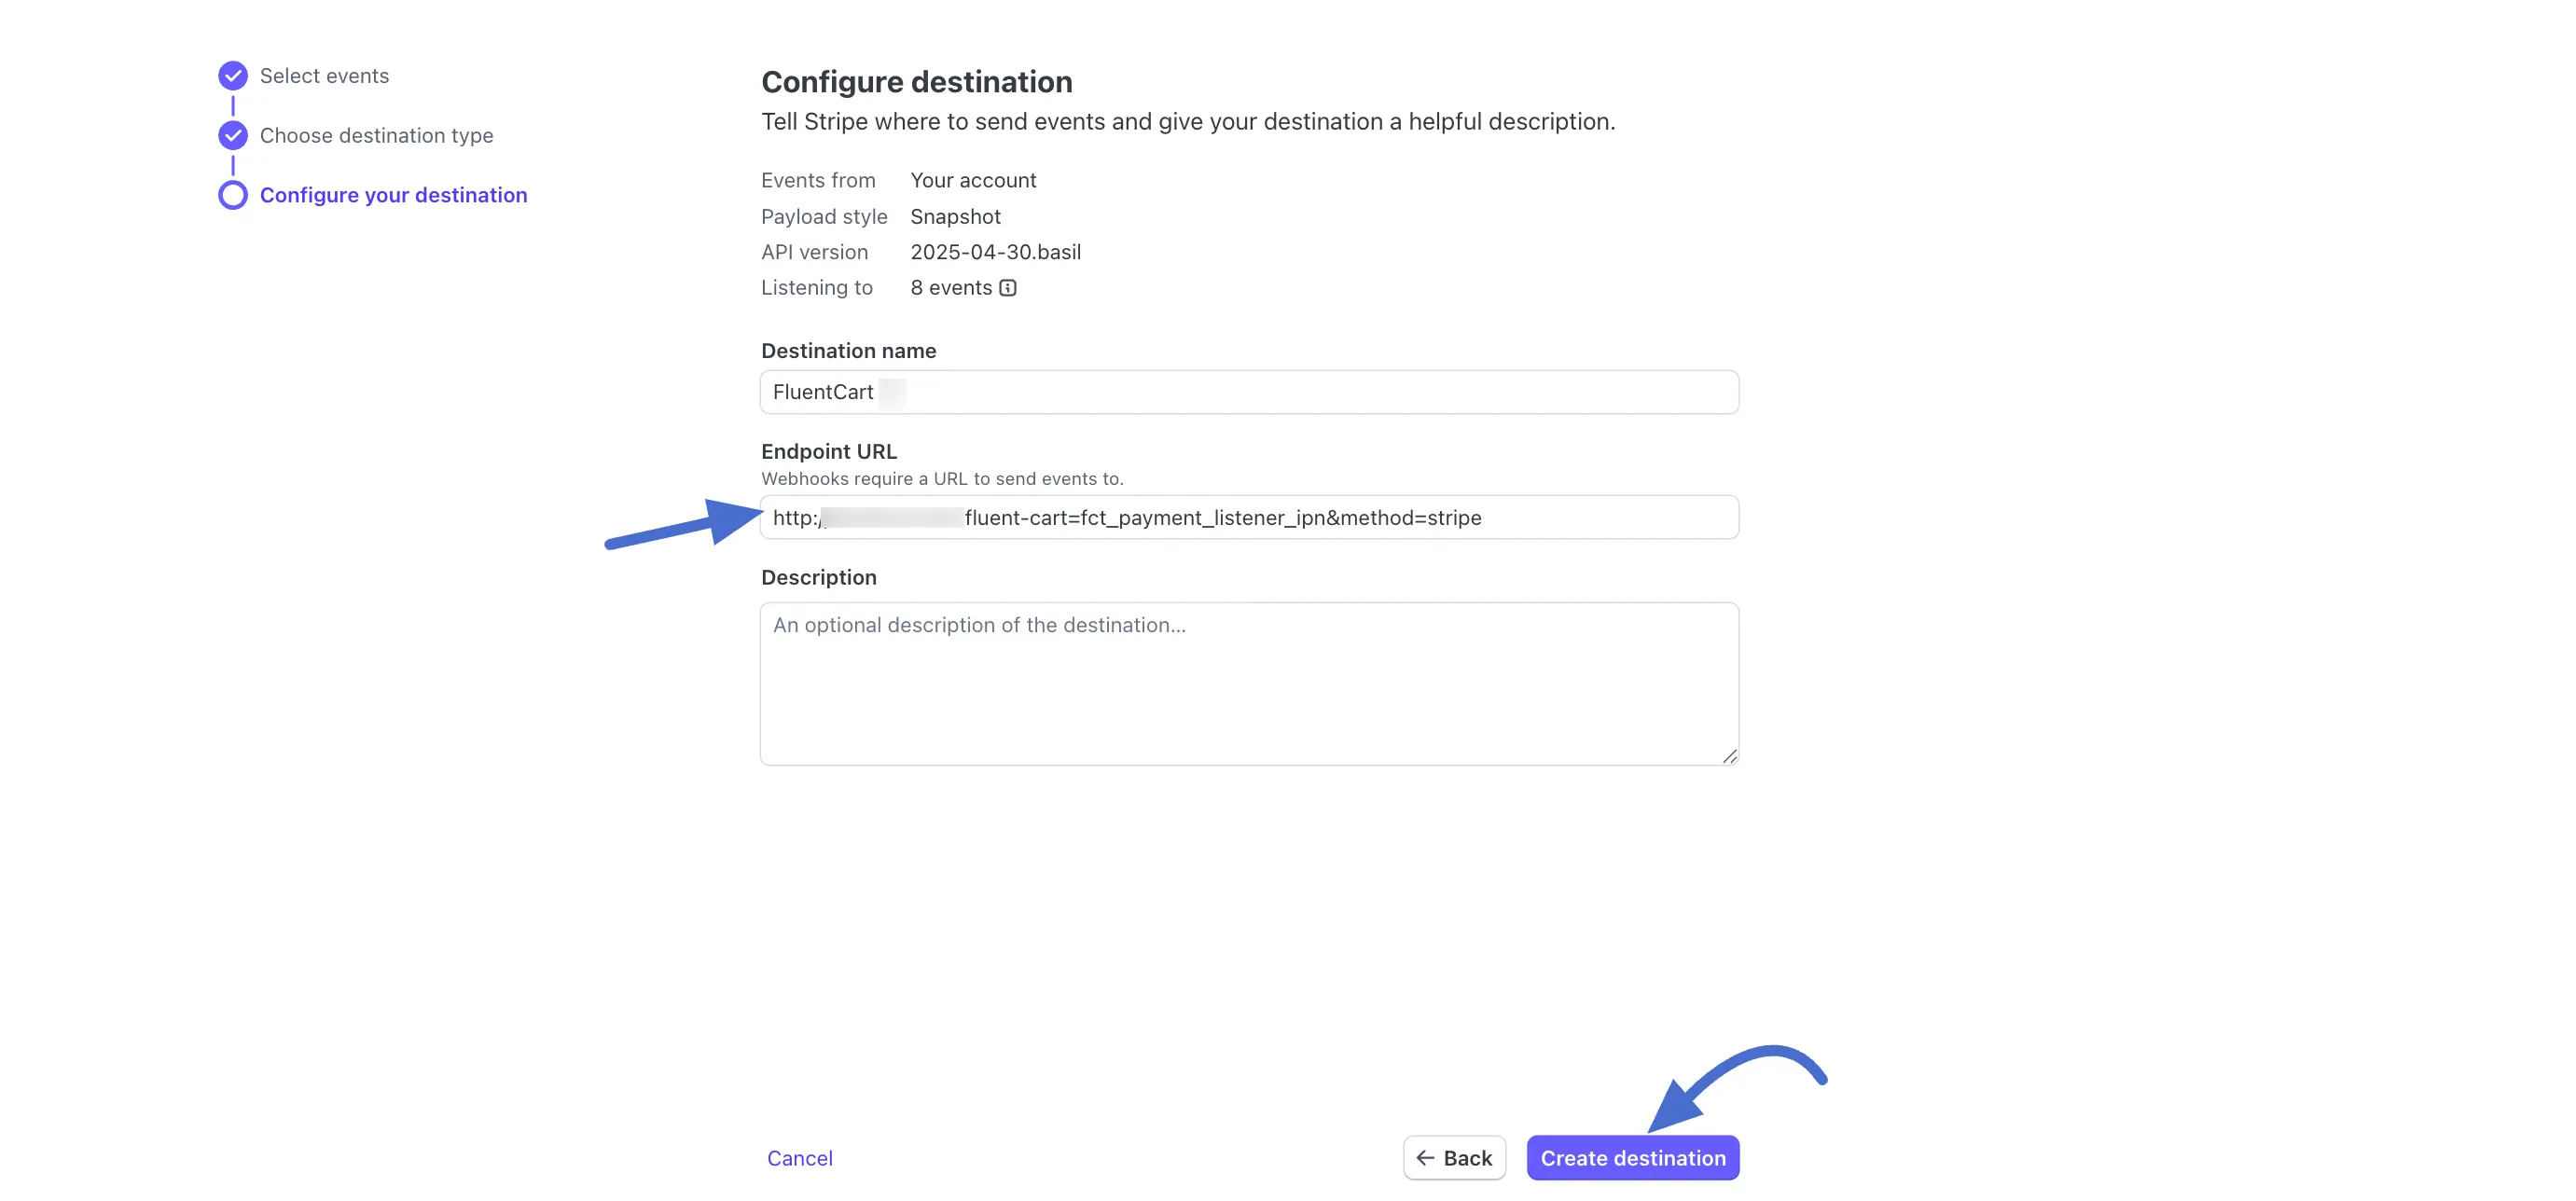
Next, type a destination name, paste the webhook URL you copied earlier into the Endpoint URL field, and then click the “Create Destination” button.

Step 4: Activate and Save
- Payment Activation: Back on the FluentCart Stripe settings page, ensure the Payment Activation toggle at the top right is switched on.
- Save Settings: Click the Save Settings button at the bottom to finalize the setup.
Your Stripe integration is now ready to securely process payments for your store!
