Appearance
Adding Coupons
This section will guide you through the process of adding a new coupon in FluentCart, allowing you to choose between different types of discounts to best suit your promotional campaigns.
Types of Coupons Available
When creating a new coupon in FluentCart, you have the flexibility to choose between two main types of discounts:
- Fixed Amount Coupons: These coupons deduct a specific monetary value (e.g., $10 off) from the total order or eligible items.
- Percentage Type Coupons: These coupons apply a percentage-based discount (e.g., 20% off) to the total order or specific items.
You can select the type that best suits your promotional needs.
Steps to Add a New Coupon
In your WordPress dashboard, go to FluentCart Pro > Coupons in the left sidebar. On the Coupons page, click the Add Coupon button in the top-right corner.

This will open the "Coupons > Add Coupon" screen, where you can set up and customize your new coupon.
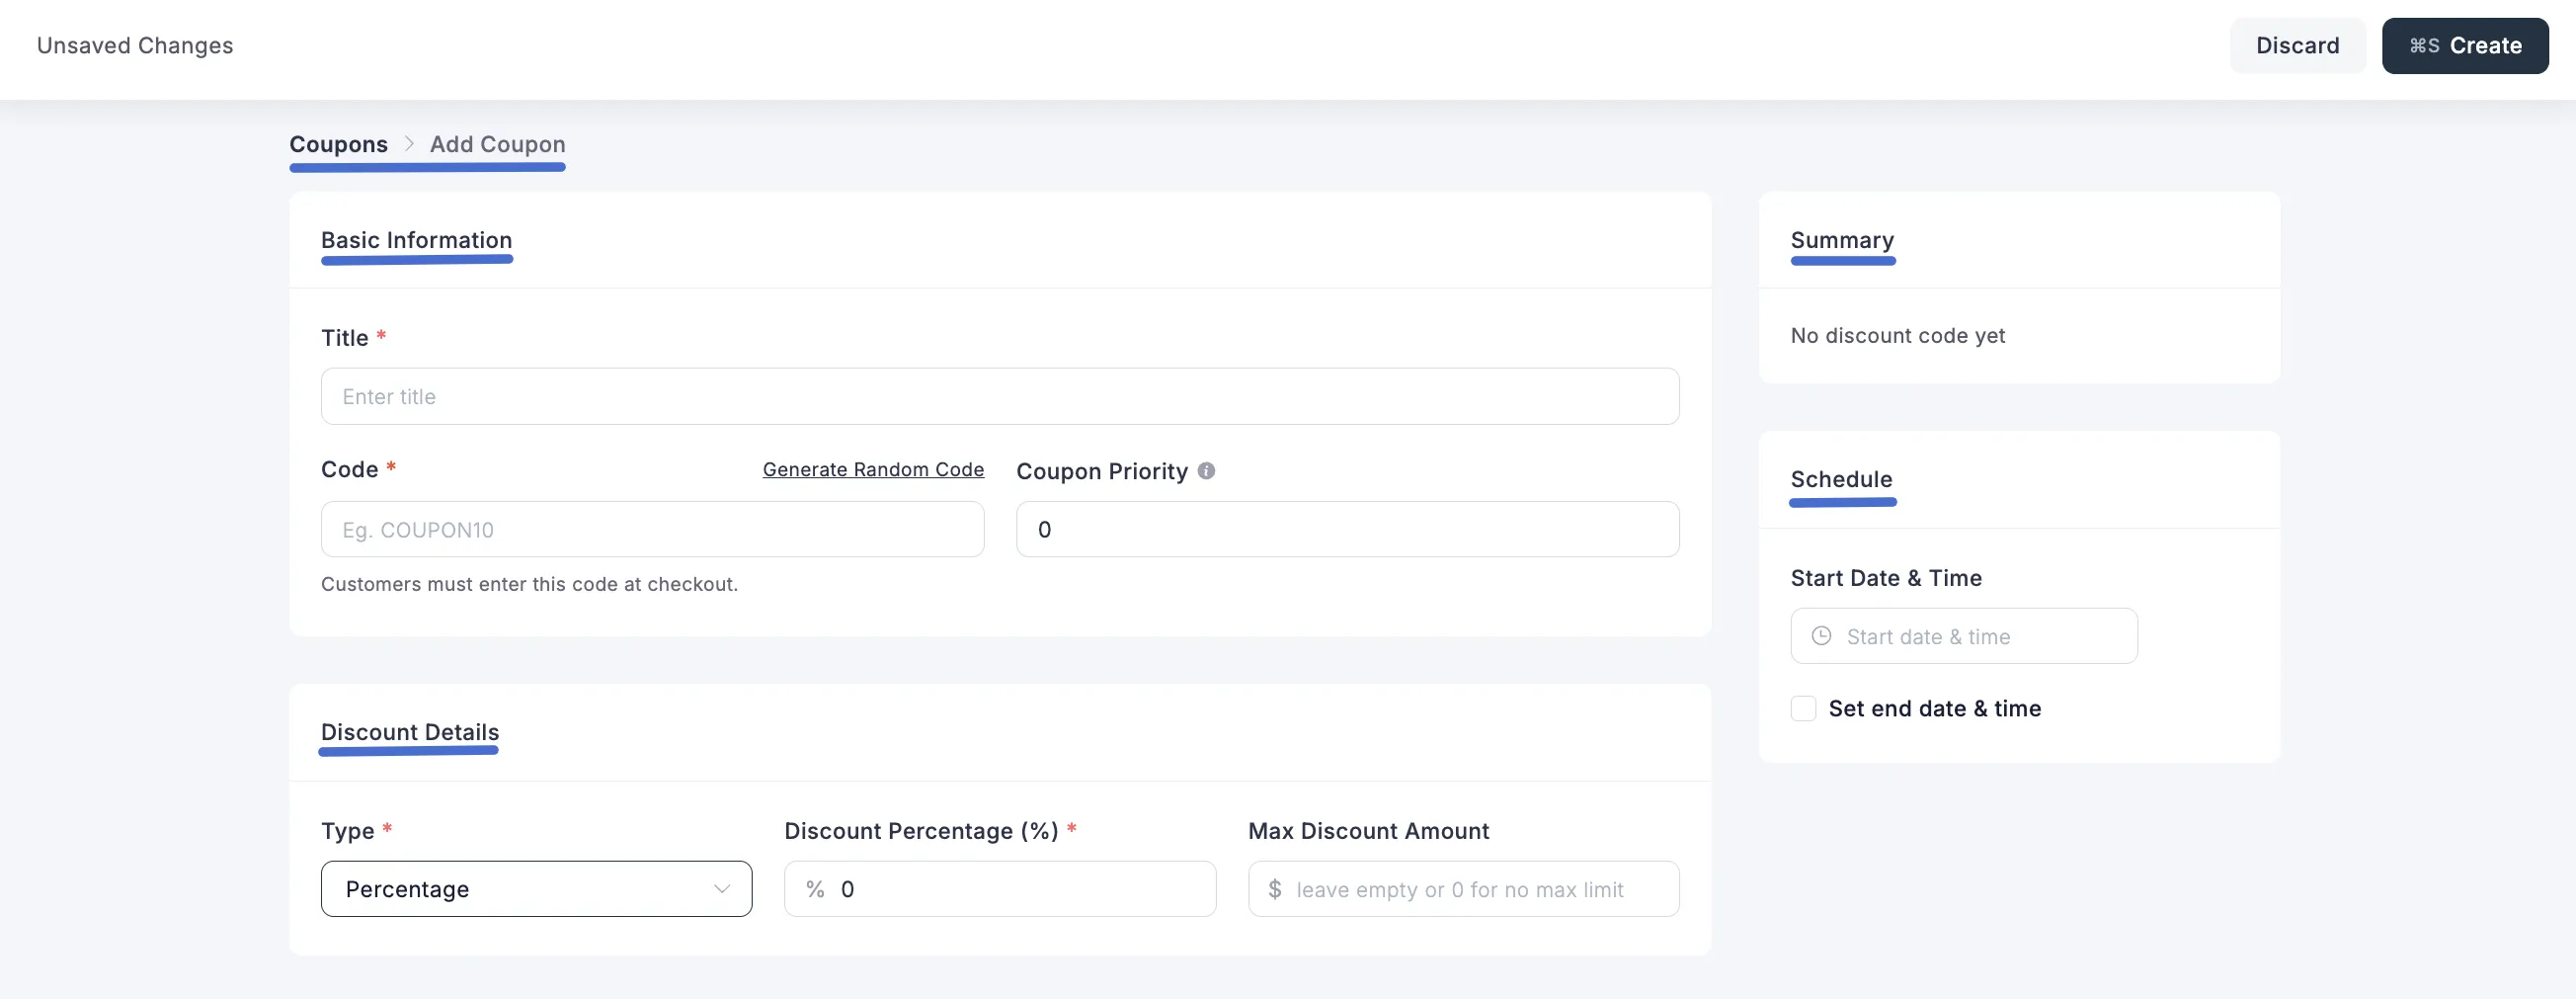
1. Basic Information
- Title: Enter an internal title for your coupon. This is for your reference and not visible to customers.
- Code: This is the actual discount code that customers will enter at checkout (e.g., "HOLIDAY10"). You can type a custom code or click "Generate Random Code" to create one automatically.
- Coupon Priority: (Optional) Enter a numerical value to set the priority of this coupon. A higher number might indicate a higher priority if multiple coupons can be applied.
2. Discount Value (Fixed Type)
Here, you can decide what kind of discount you want to offer.
Type: You can choose between two types:
Fixed: This takes a specific amount of money off the total, like $5 off.
Percentage: This takes a percentage off the total, like 10% off.
Discount Amount: Enter the value of your discount here. If you choose Fixed, enter a number like 5 for a $5 discount. If you choose Percentage, enter a number like 10 for a 10% discount. You can also leave it blank or set it to 0 for no maximum limit.
- Max Discount Amount: (Optional) Enter the maximum discount amount a customer can get. This is especially helpful for percentage-based coupons to make sure the discount doesn’t get too large on high-value orders.
3. Schedule
On the right side of the screen, you’ll find the Schedule box. This is where you can make your coupon work only for a specific time.
Start Date & Time: Set when you want the coupon to start working.
Set end date & time: Check this box and pick a date and time for the coupon to automatically expire.
4. Usage Restrictions
Sometimes, you don’t want a coupon to be used for every single thing in your store. Usage restrictions let you set the "rules" for how and when a discount can be used. This helps you protect your profits while still offering great deals to the right people.
Spending Limits
- Min Spend Amount: The customer's cart must reach this total before the coupon will work.
- Max Spend Amount: You can set a limit so the coupon won't work if the cart total is too high. If you don't want a limit, just leave this empty.
Picking Specific Items
- Include/Exclude Categories: You can choose to make a coupon work only for certain groups of products (like "Winter Gear") or keep it from working on others.
- Include/Exclude Products: If you have one specific product that you don't want to discount, you can list it here to exclude it from the deal.
Restricting by User
- By Email Address: You can limit a coupon so only specific people can use it by entering their email addresses here. This is perfect for sending a "thank you" discount to a single loyal customer.
Recurring Coupons
FluentCart supports 100% recurring discounts for subscriptions. This means a coupon can apply not just to the first payment, but to every renewal for as long as the subscription remains active.
Make this coupon recurring
When enabled, the discount will automatically apply on each billing cycle—no manual work required.
Why Use This
- Free Team Access: Give your own staff or testers completely free access to your services.
- Sponsor Memberships: Allow a sponsor to pay for a customer's membership so the customer pays $0 for every renewal.
- Influencer Perks: Create special links for partners that give their followers zero-cost renewals for a set time.
- Lifetime Trials: Launch plans that stay free until you decide to change them manually
NOTE
This feature makes your store more flexible because it doesn't assume every subscription has to make money immediately. It also makes your reports and renewal logic much safer for the long term.
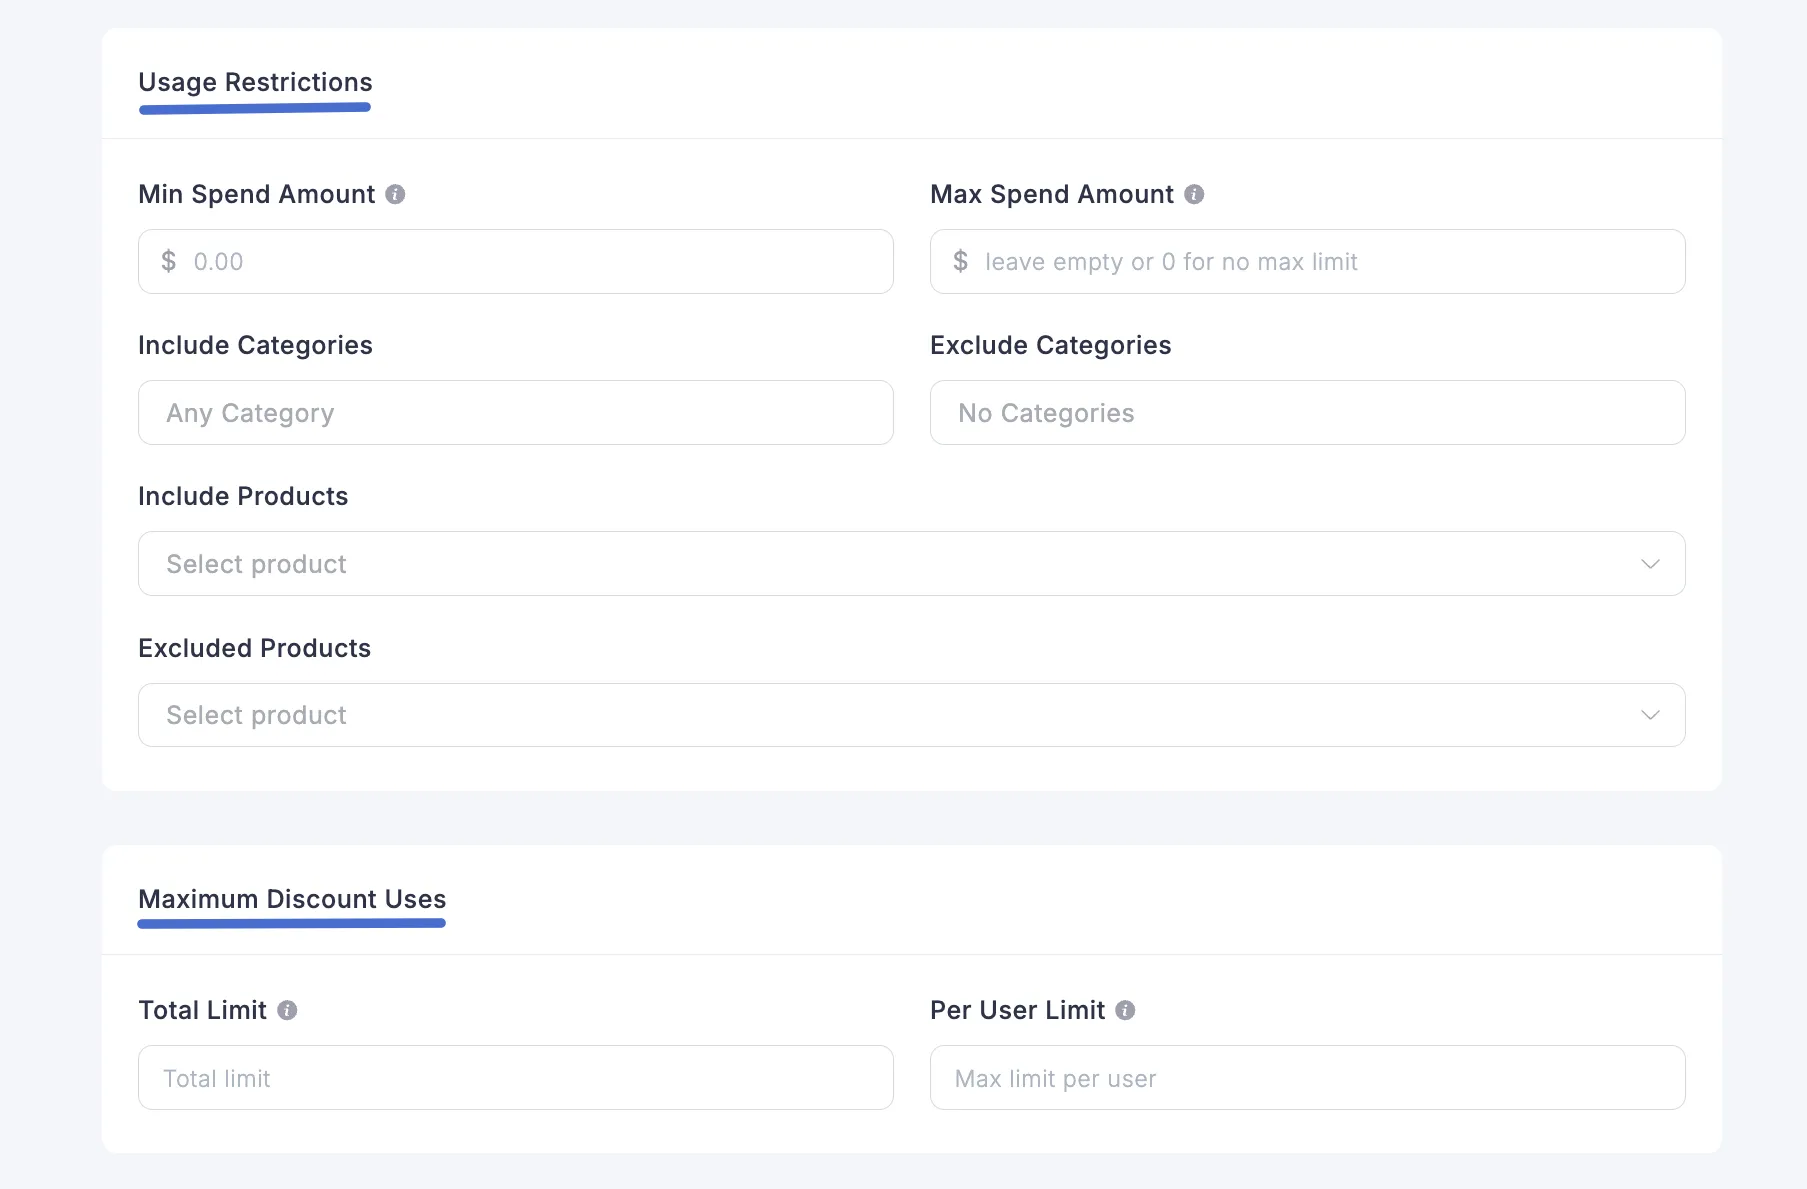
5. Maximum Discount Uses
Control how many times the coupon can be used.
- Total Limit: Enter the maximum number of times this coupon can be used across all customers. Enter "0" for unlimited usage.
- Per User Limit: Enter the maximum number of times a single customer can use this coupon. Enter "0" for unlimited usage per user.
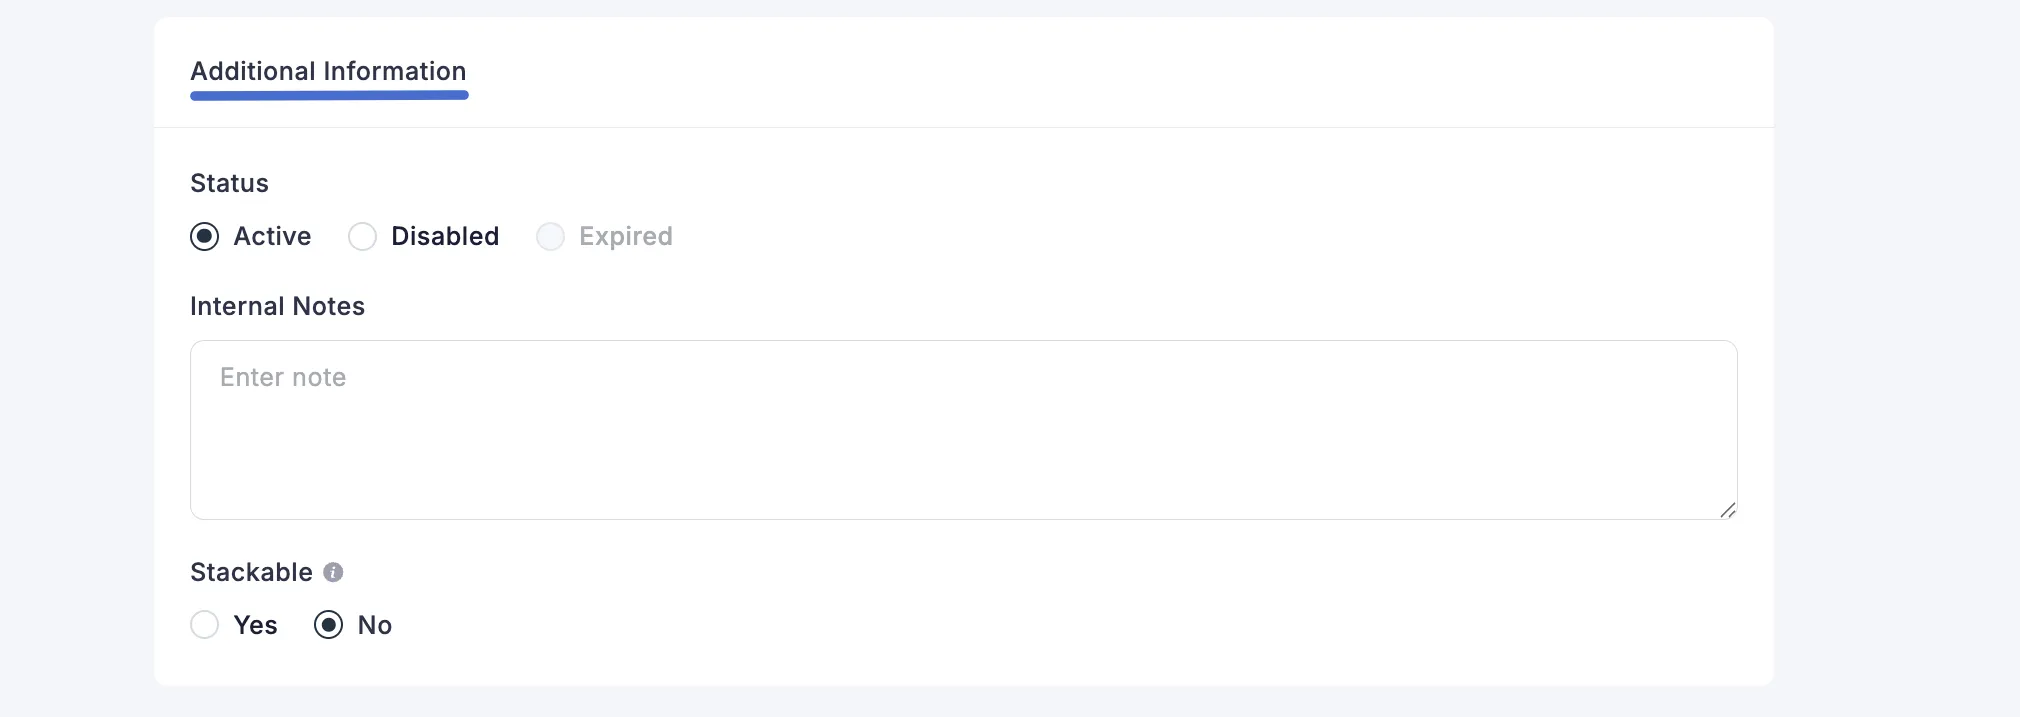
6. Additional Information
Status:
- Active: The coupon is live and can be used right away.
- Disabled: The coupon is turned off and cannot be used.
- Expired: The coupon has passed its end date.
Internal Notes: (Optional) You can leave a private note for yourself here, like "This coupon is for our newsletter subscribers."
Stackable: If you select Yes, customers can use this coupon with other coupons in the same purchase. If you select No, it can only be used by itself.
Saving Your Coupon
Once all settings are configured, click the "Save" button at the top of the page (if visible, or "Update" if editing) to create or update your fixed type coupon.
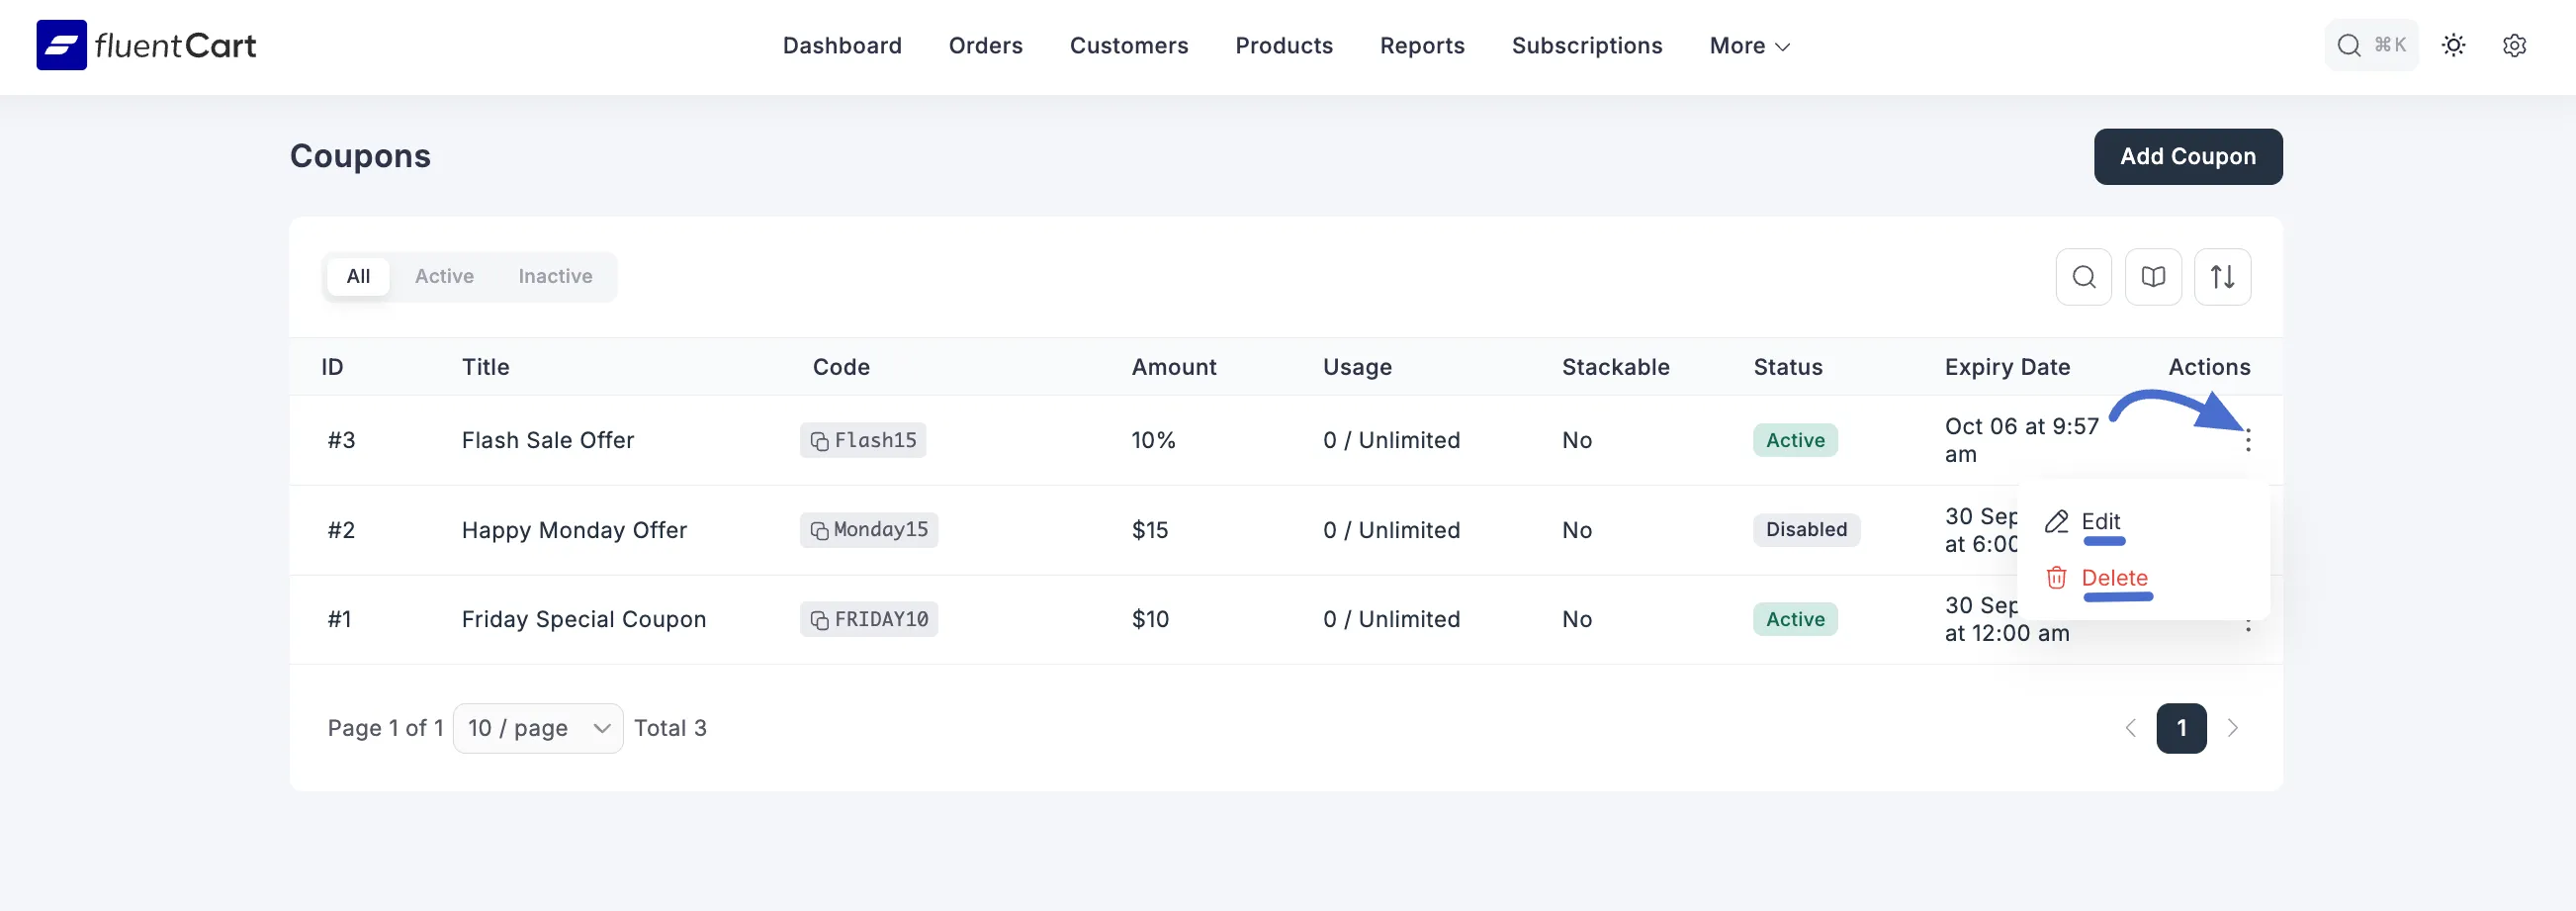
Editing or Deleting a Coupon
After you've created coupons, you can always go back to change their settings or remove them completely.
First, find the coupon you want to manage in your coupons list. On the far right side of that coupon's row, under the Actions column, click the three-dot icon. A small menu will pop up with two options:
Edit: Choose this to open the settings for that coupon. You can then make any changes you need and save them.
Delete: Choose this to permanently remove the coupon. A confirmation window will likely appear to make sure you don't delete it by accident.